01
Categories, products and prices
The menu is the shared foundation for the public website and POS. When the name, price and VAT rate are correct in one place, customers and staff see the same information.
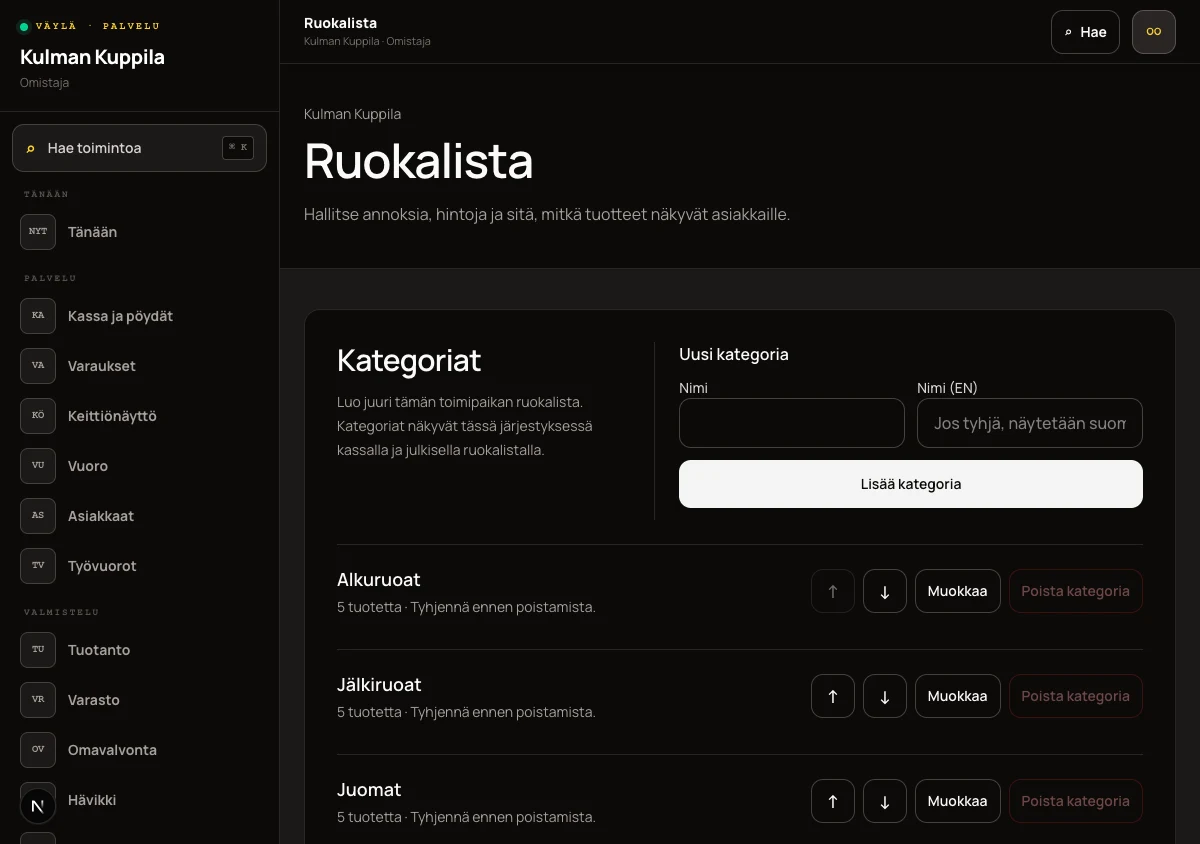
Open Menu from the staff home page. First create the categories this location needs, such as Lunch, Beer or Wine. Preset starter or main-course categories are not forced. Categories can be named, translated, reordered and deleted when empty.
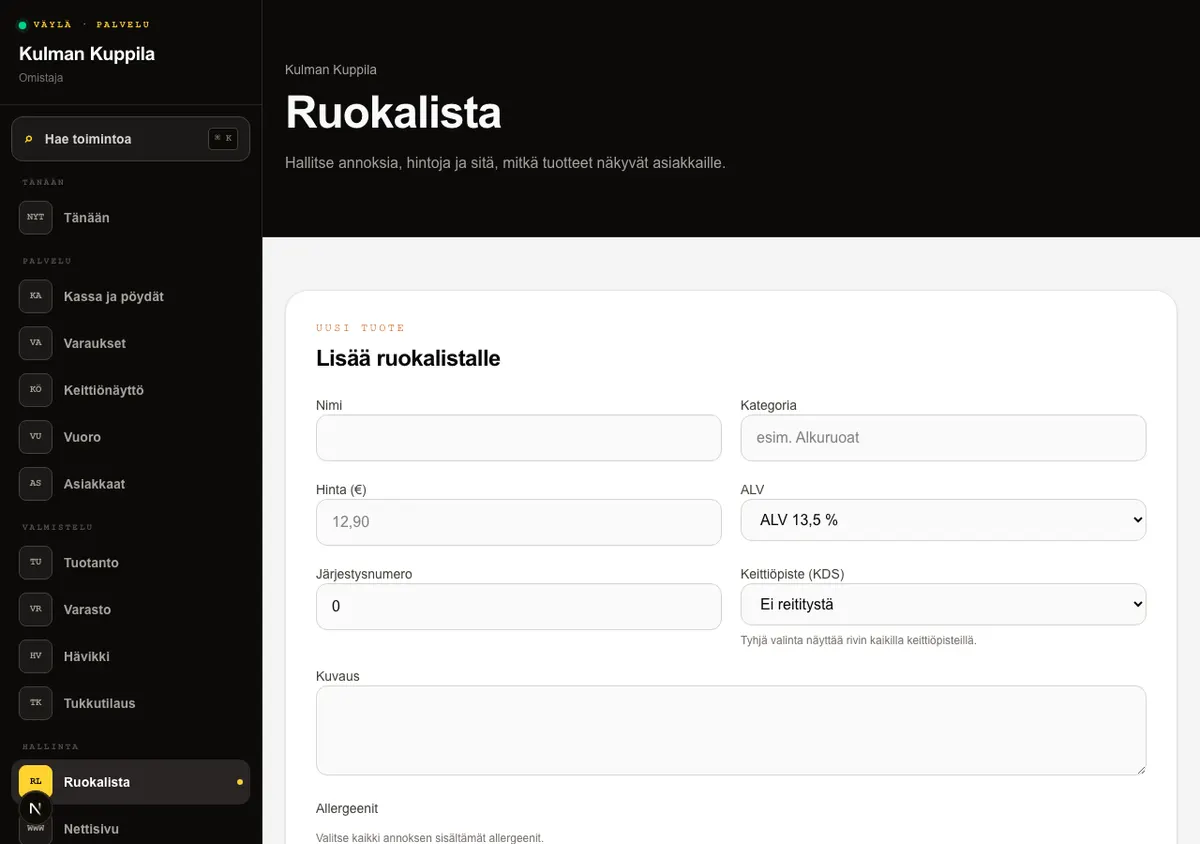
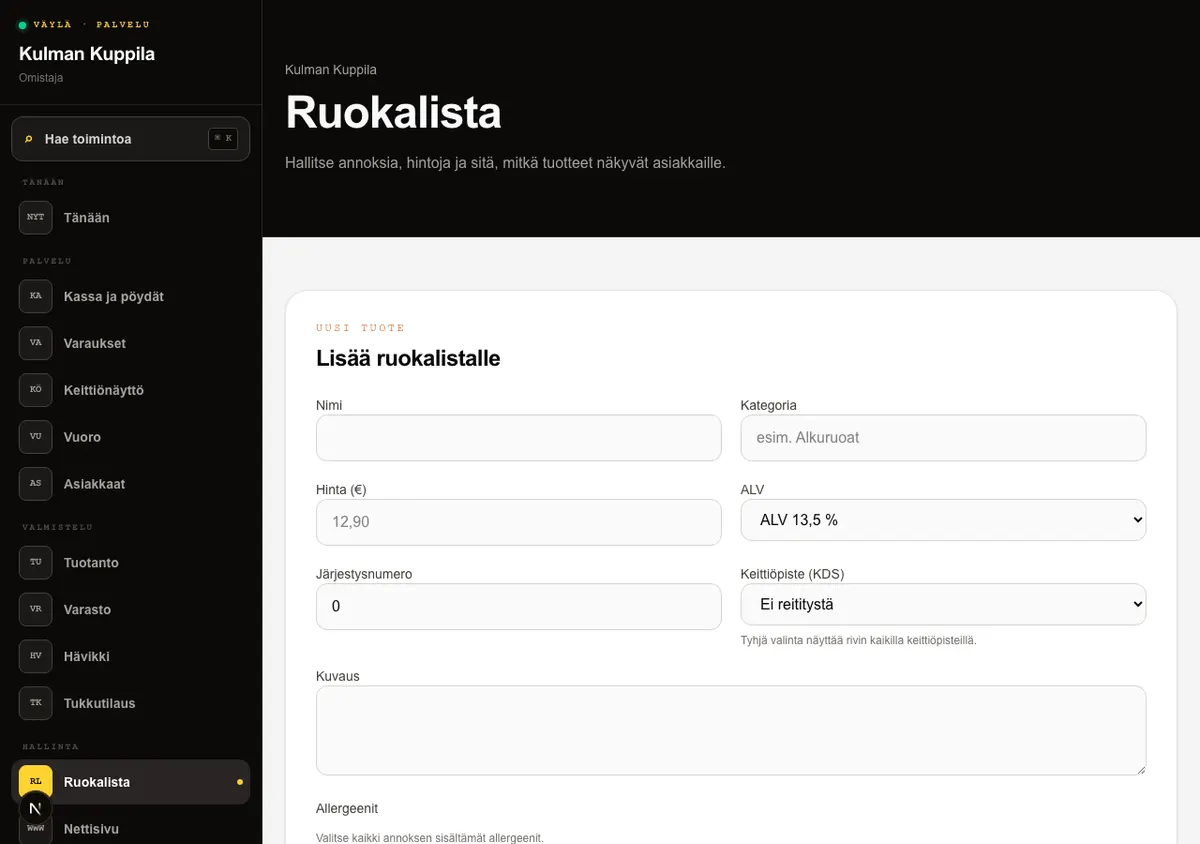
For a new product, enter a name, select a category you created, enter the VAT-inclusive Price (€), VAT rate of 13.5% or 25.5%, sort order and, optionally, a description.
Existing products use a compact list so even a long menu stays fast to scan. Availability and public visibility can be changed directly on the row. Open image, recipe and other fields only when needed with Edit details.
How to do it
- 1Add the categories you need under Categories and arrange them with the arrow buttons.
- 2Complete the Add to menu form.
- 3Select the correct VAT rate and select Add product.
- 4Edit an existing product and select Save changes.
- 5Use Hide product and Publish product to change its public visibility.
Who can do this?
- Owner
- Manager
02
English names and descriptions
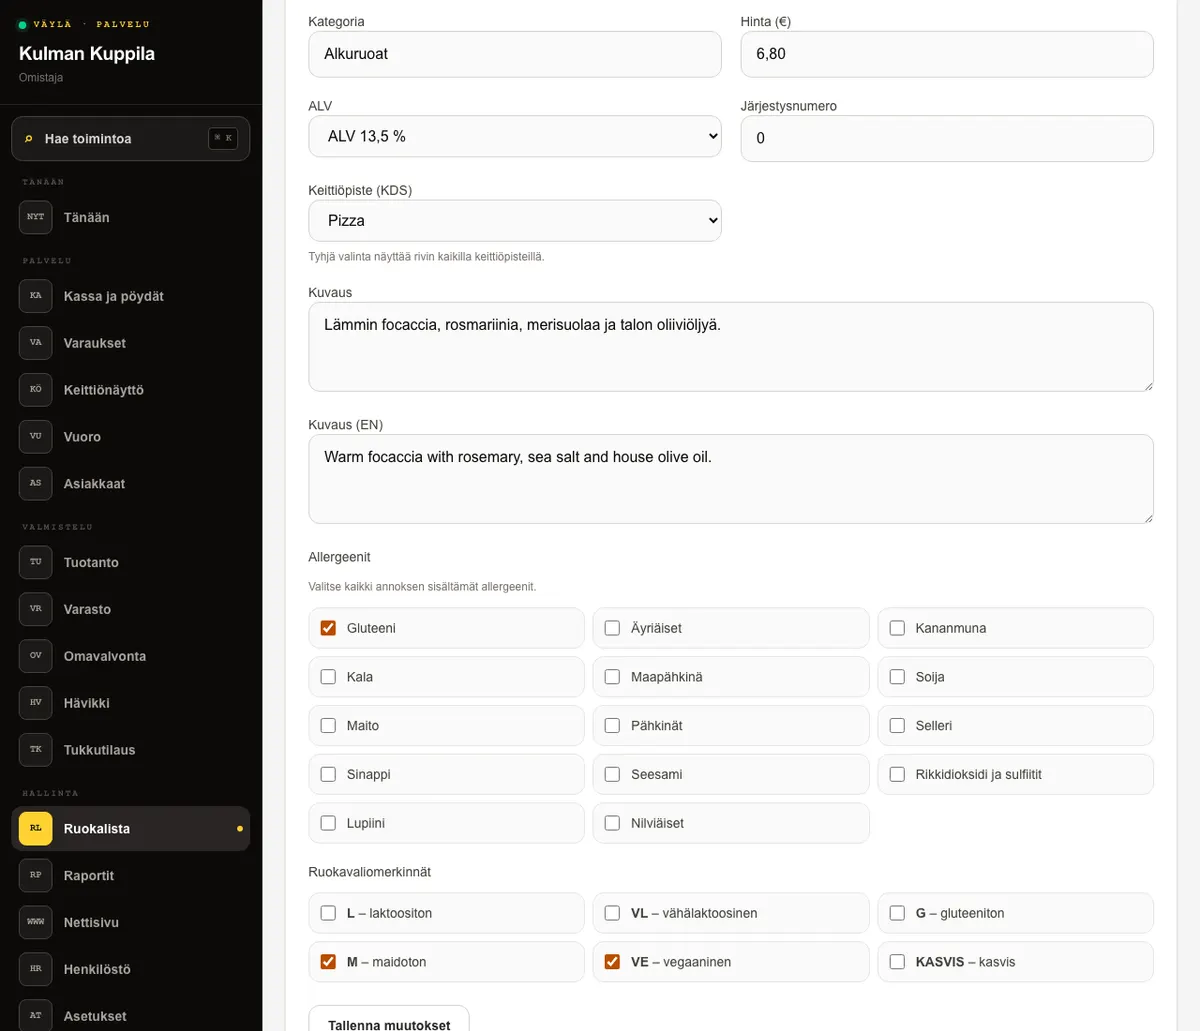
You can add an English name and description for international customers. The English menu appears on the /en version of the restaurant’s public website.
The Name (EN) and Description (EN) fields are optional. If a field is empty, the English page shows the corresponding Finnish text, so customers never see an empty name or description.
How to do it
- 1Open Menu and add a new product or open an existing product for editing.
- 2Enter the translations in Name (EN) and Description (EN).
- 3Select Add product or Save changes.
- 4Check the result on the /en version of the restaurant’s public website.
Who can do this?
- Owner
- Manager
03
Allergens and dietary labels
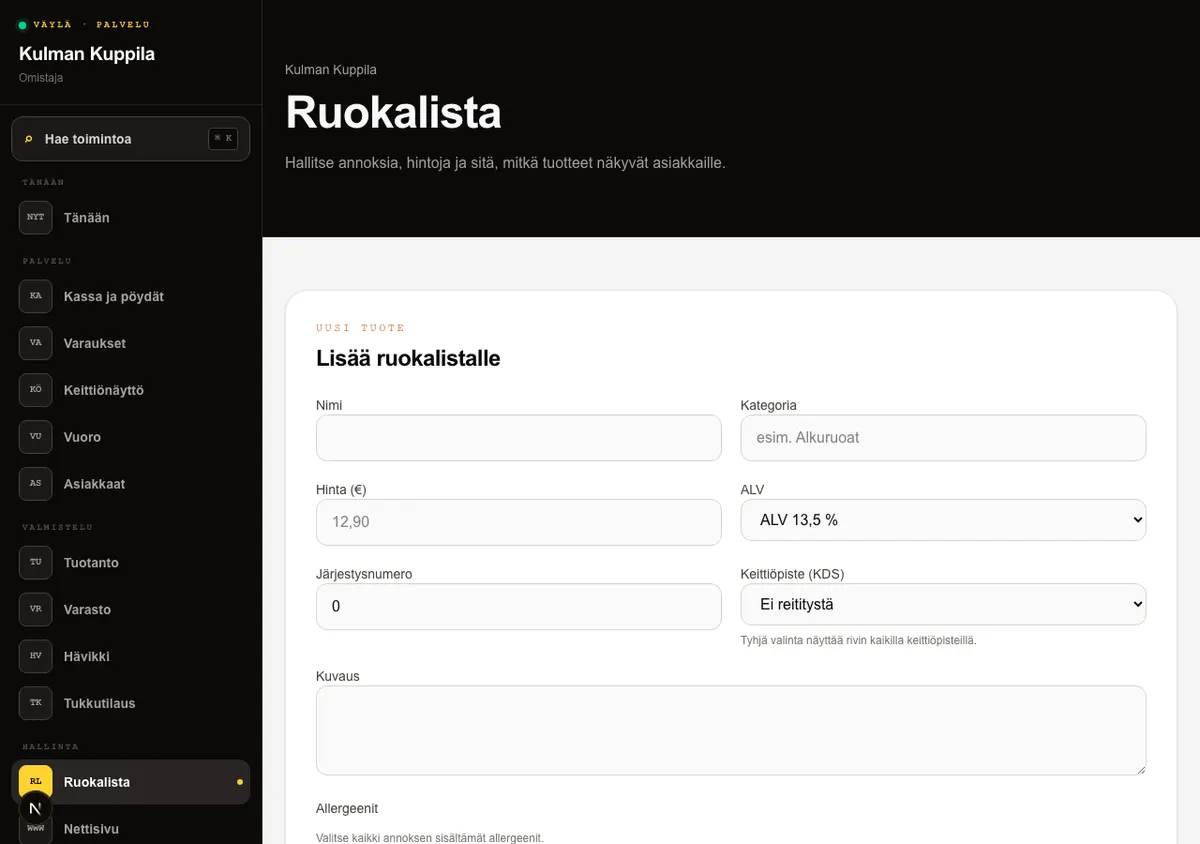
EU Regulation No 1169/2011 requires food allergens to be communicated to customers. Select every allergen in a dish and keep the details up to date whenever its recipe changes.
Dietary labels such as L, G and VE appear beside the dish name on the public menu. Allergens also appear below the dish and on the kitchen display.
How to do it
- 1Under Allergens, select every allergen contained in the dish.
- 2Select the required Dietary labels.
- 3Select Add product or Save changes.
- 4Always check the published menu after a recipe or ingredient changes.
Who can do this?
- Owner
- Manager
04
Dish availability during service
Mark a dish sold out as soon as it can no longer be sold. A sold-out dish disappears from the customer’s public menu, but remains dimmed in POS with a Sold out label and cannot be added to an order.
Availability is intended for a temporary 86 situation. Use Hide product if a dish will be off the menu for longer. Under the current permissions model, only an owner or manager can change availability.
How to do it
- 1Open Menu and find the sold-out dish.
- 2Select Mark sold out. The Sold out label appears on the dish.
- 3When the dish can be sold again, select Mark available.
- 4Check the public menu and POS when needed.
Who can do this?
- Owner
- Manager
05
Dish images
A dish image can be added after the product has been created. PNG, JPEG and WebP images are accepted, with a maximum file size of 2 MB.
The saved image appears on the customer’s public menu and as a small thumbnail on the POS product button. Leave the image empty if you do not have an up-to-date photo of the dish.
How to do it
- 1Open an existing product in Menu.
- 2Choose a file under Dish image and select Upload image.
- 3Replace the image by uploading a new file, or remove it with Remove image.
- 4Check the result on the public menu and in POS.
Who can do this?
- Owner
- Manager
06
Kitchen stations
A kitchen station determines which kitchen display receives an order line. Stations such as Kitchen or Bar are added in the POS floor plan editor.
Select a Kitchen station (KDS) for the product. If the selection is empty, the line appears at every kitchen station.
Who can do this?
- Owner
- Manager
07
Recipe and inventory deduction
When the Inventory module is enabled, ingredients and quantities per portion can be attached to a product. This keeps stock levels closer to actual consumption.
Add the ingredients in Inventory first. Then, under Recipe on the menu product, select an ingredient, enter the Quantity / portion and select Add row. When the order line is sent to the kitchen, the recipe quantity is deducted from stock. Voiding the line restores the deduction.
Who can do this?
- Owner
- Manager