
01
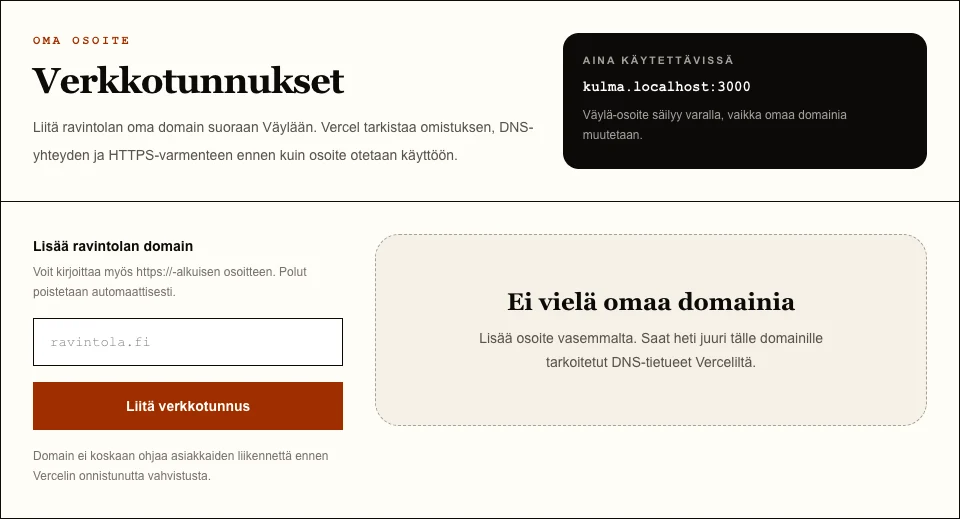
Connect the restaurant’s own domain
The restaurant’s own domain is connected from Website directly to the Vercel Domains API. Väylä shows the recommended A or CNAME record for that domain and, when required, a TXT ownership-verification record. Vercel manages the HTTPS certificate automatically.
The domain does not receive customer traffic until Vercel has verified both ownership and the DNS connection. The restaurant’s own Väylä address always remains available as a fallback.
How to do it
- 1Open Website from the main menu and find Domains.
- 2Enter the restaurant domain, for example restaurant.fi, and select Connect domain.
- 3Copy the DNS record shown by Väylä into your domain provider’s DNS management.
- 4If TXT verification is shown, add that record too, using the exact values provided.
- 5Return to Väylä and select Check connection. The address is enabled only after Vercel accepts it.
- 6If there are several verified domains, select the primary customer address.
Who can do this?
- Owner
- Manager
02
Start with sample content
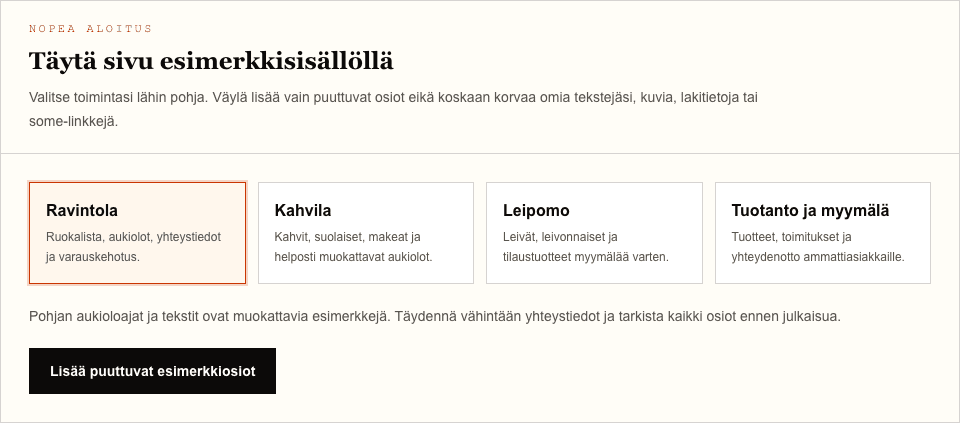
If a blank page feels difficult, choose a restaurant, café, bakery, or production and shop template. Väylä adds ready-made hero, menu, opening-hours and contact sections. The restaurant template also includes a booking call to action when Bookings is enabled.
Only missing sections are added. Your own text, images, social links and legal details remain unchanged. For safety, sample content cannot be added directly to a published website.
How to do it
- 1Return a published website to draft when needed.
- 2Under Fill website with sample content, choose the template closest to your business.
- 3Select Add missing sample sections.
- 4Replace the opening hours, contact details, text and categories with your own.
- 5Review the result and publish the website only after that.
Who can do this?
- Owner
- Manager
03
Build the website from sections
The section editor lets you build a clear website without code. Ready-made sections keep the design consistent and prevent accidental breakage.
Open Website from the staff home page. You can add a hero, menu, opening-hours, contact and booking call-to-action section.
How to do it
- 1Under Add new section, choose a section type and select Add section.
- 2Complete the section fields and select Save section.
- 3Change the order with Move section up and Move section down.
- 4Remove an unnecessary section with Delete section.
Who can do this?
- Owner
- Manager
04
Hero image
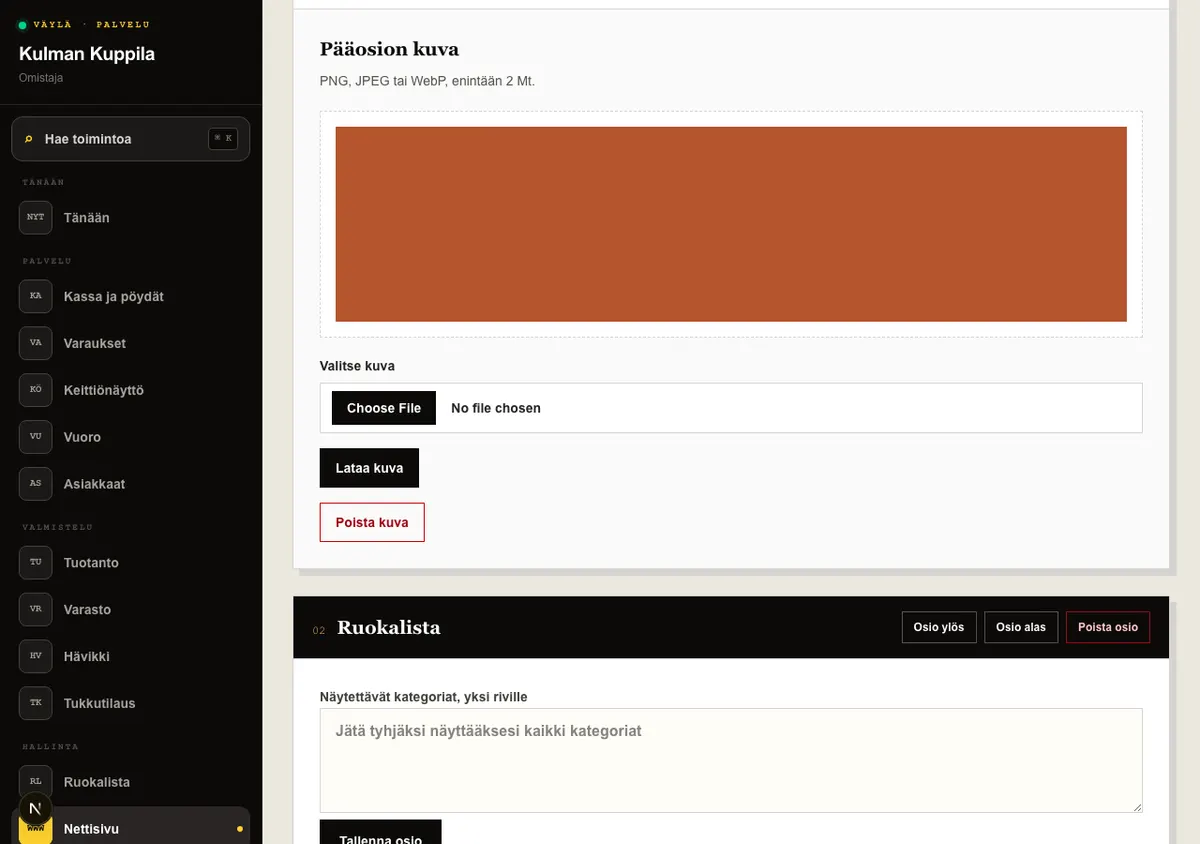
The hero image appears as the large background image on the public website. You can upload a PNG, JPEG or WebP image of up to 2 MB.
The current image appears in the hero editor. Uploading a new image replaces it, and you can also remove the image completely.
How to do it
- 1Add a hero section or open an existing one.
- 2Choose an image file under Hero image and select Upload image.
- 3Remove the current image with Remove image when needed.
Who can do this?
- Owner
- Manager
05
Gallery
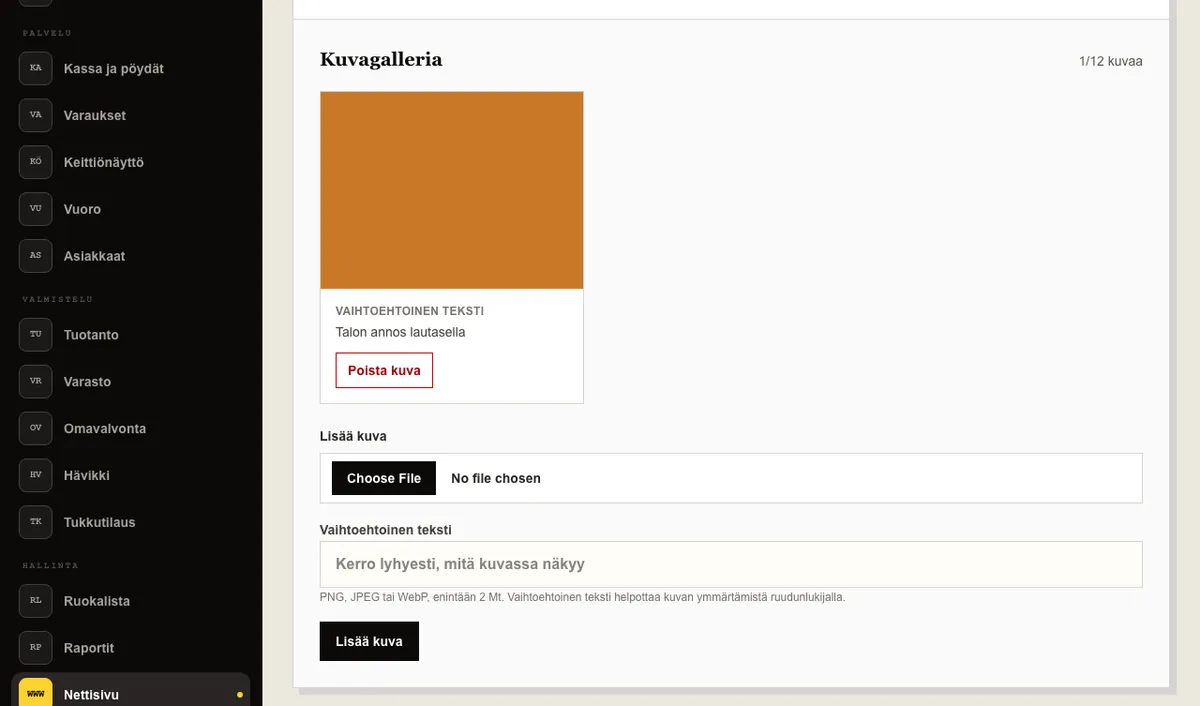
Use a gallery to show dishes, the dining room or the restaurant atmosphere on the public website. A gallery can contain up to 12 PNG, JPEG or WebP images, each no larger than 2 MB.
You can give the gallery a heading. When uploading each image, add concise alternative text that describes its content. To change the text later, remove the image and upload it again.
How to do it
- 1Under Add new section, select Gallery and then Add section.
- 2Optionally enter a heading and select Save section.
- 3Choose an image file, enter alternative text and select Add image.
- 4Remove an unnecessary image with its own Remove image button.
Who can do this?
- Owner
- Manager
06
Menu, opening hours and booking call to action
The menu section uses published products from Menu. You can show every category or enter the categories to display, one per line.
Opening hours can be entered manually or loaded from booking settings. The booking call to action takes customers to the restaurant’s own booking form, so place it somewhere prominent.
Who can do this?
- Owner
- Manager
07
Social links and legal pages
Instagram, Facebook and TikTok links appear as recognisable icons in the public website contact section and footer. Väylä only accepts the corresponding service’s own address in each field.
Väylä creates a privacy notice, customer and booking terms, and cookie notice for the restaurant from safe templates. Complete the official company name, business ID, postal address and privacy email. The business ID check digit is validated automatically, but always verify company details through the Finnish Business Information System.
Legal pages cannot be published without complete controller details. You can save incomplete details as a draft and add restaurant-specific text after the templates. HTML is not accepted in additional text.
How to do it
- 1Open Website and go to Social links and legal pages.
- 2Enter the addresses of the social profiles you use and select Save social links.
- 3Complete the controller’s official details and any restaurant-specific additions.
- 4Enable legal-page publishing and select Save legal pages.
- 5Open the public website and check the Privacy, Terms and Cookies links in the footer.
Who can do this?
- Owner
- Manager
08
English website
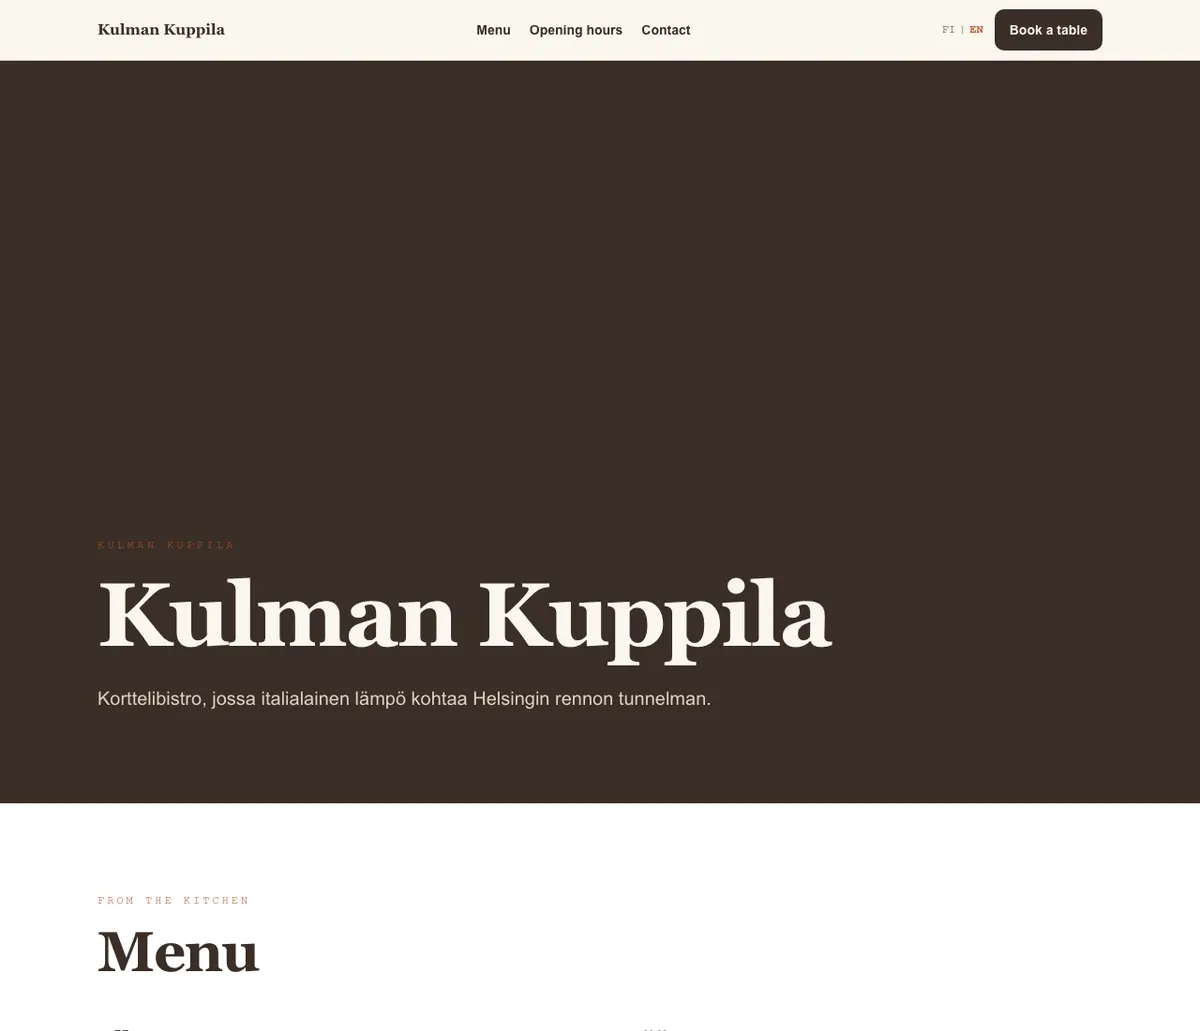
The Finnish public website opens at the restaurant’s own address, and the English version at the /en path of the same address. Customers can switch languages with the FI and EN options in the header.
English text can be saved in dedicated EN fields for the hero, opening-hours text, booking call to action and gallery. English alternative text for a gallery image is entered when the image is uploaded.
EN fields are optional. If an English field is empty, the page shows the Finnish text instead, so a missing translation never leaves the customer with empty content. Menu product names and descriptions are currently shown in Finnish on the English page as well.
Who can do this?
- Owner
- Manager
09
Appearance
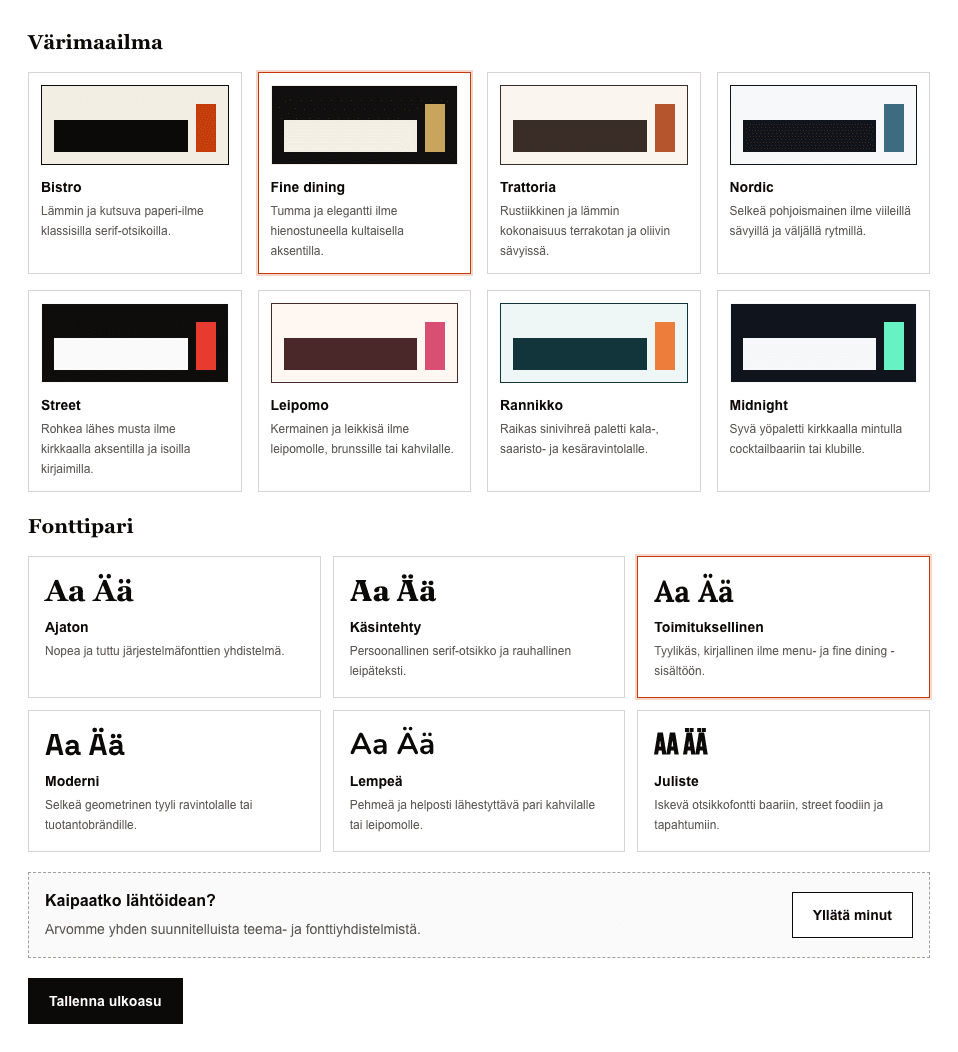
Under Appearance, you can combine eight colour themes with six font pairs. Bistro, Fine dining, Trattoria, Nordic, Street, Bakery, Coast and Midnight suit different restaurant, café, bakery and bar concepts. The selection does not change the content you have added.
Surprise me prefills one of the designed theme and font combinations. You can try another suggestion or change either selection manually. The public website changes only after you select Save appearance.
You can upload the restaurant logo as a PNG, JPEG or WebP file of up to 1 MB. SVG files are not accepted. The app icon must also be square and at least 512 × 512 pixels.
If the logo already contains the restaurant name, clear Show restaurant name next to logo. The name remains available to screen readers, but is not shown a second time in the header or footer.
When a customer installs the website as a PWA, the restaurant website appears on their home screen with the restaurant’s own app icon. The Staff link in the public website footer opens staff sign-in.
How to do it
- 1Choose a colour theme and font pair, or select Surprise me.
- 2Review the suggested combination and select Save appearance.
- 3Choose a logo file on the Logo card and select Upload image.
- 4Choose whether to show the restaurant name next to the logo and save the name setting.
- 5Choose a square icon file on the App icon card and select Upload image.
Who can do this?
- Owner
- Manager
10
Preview and publish
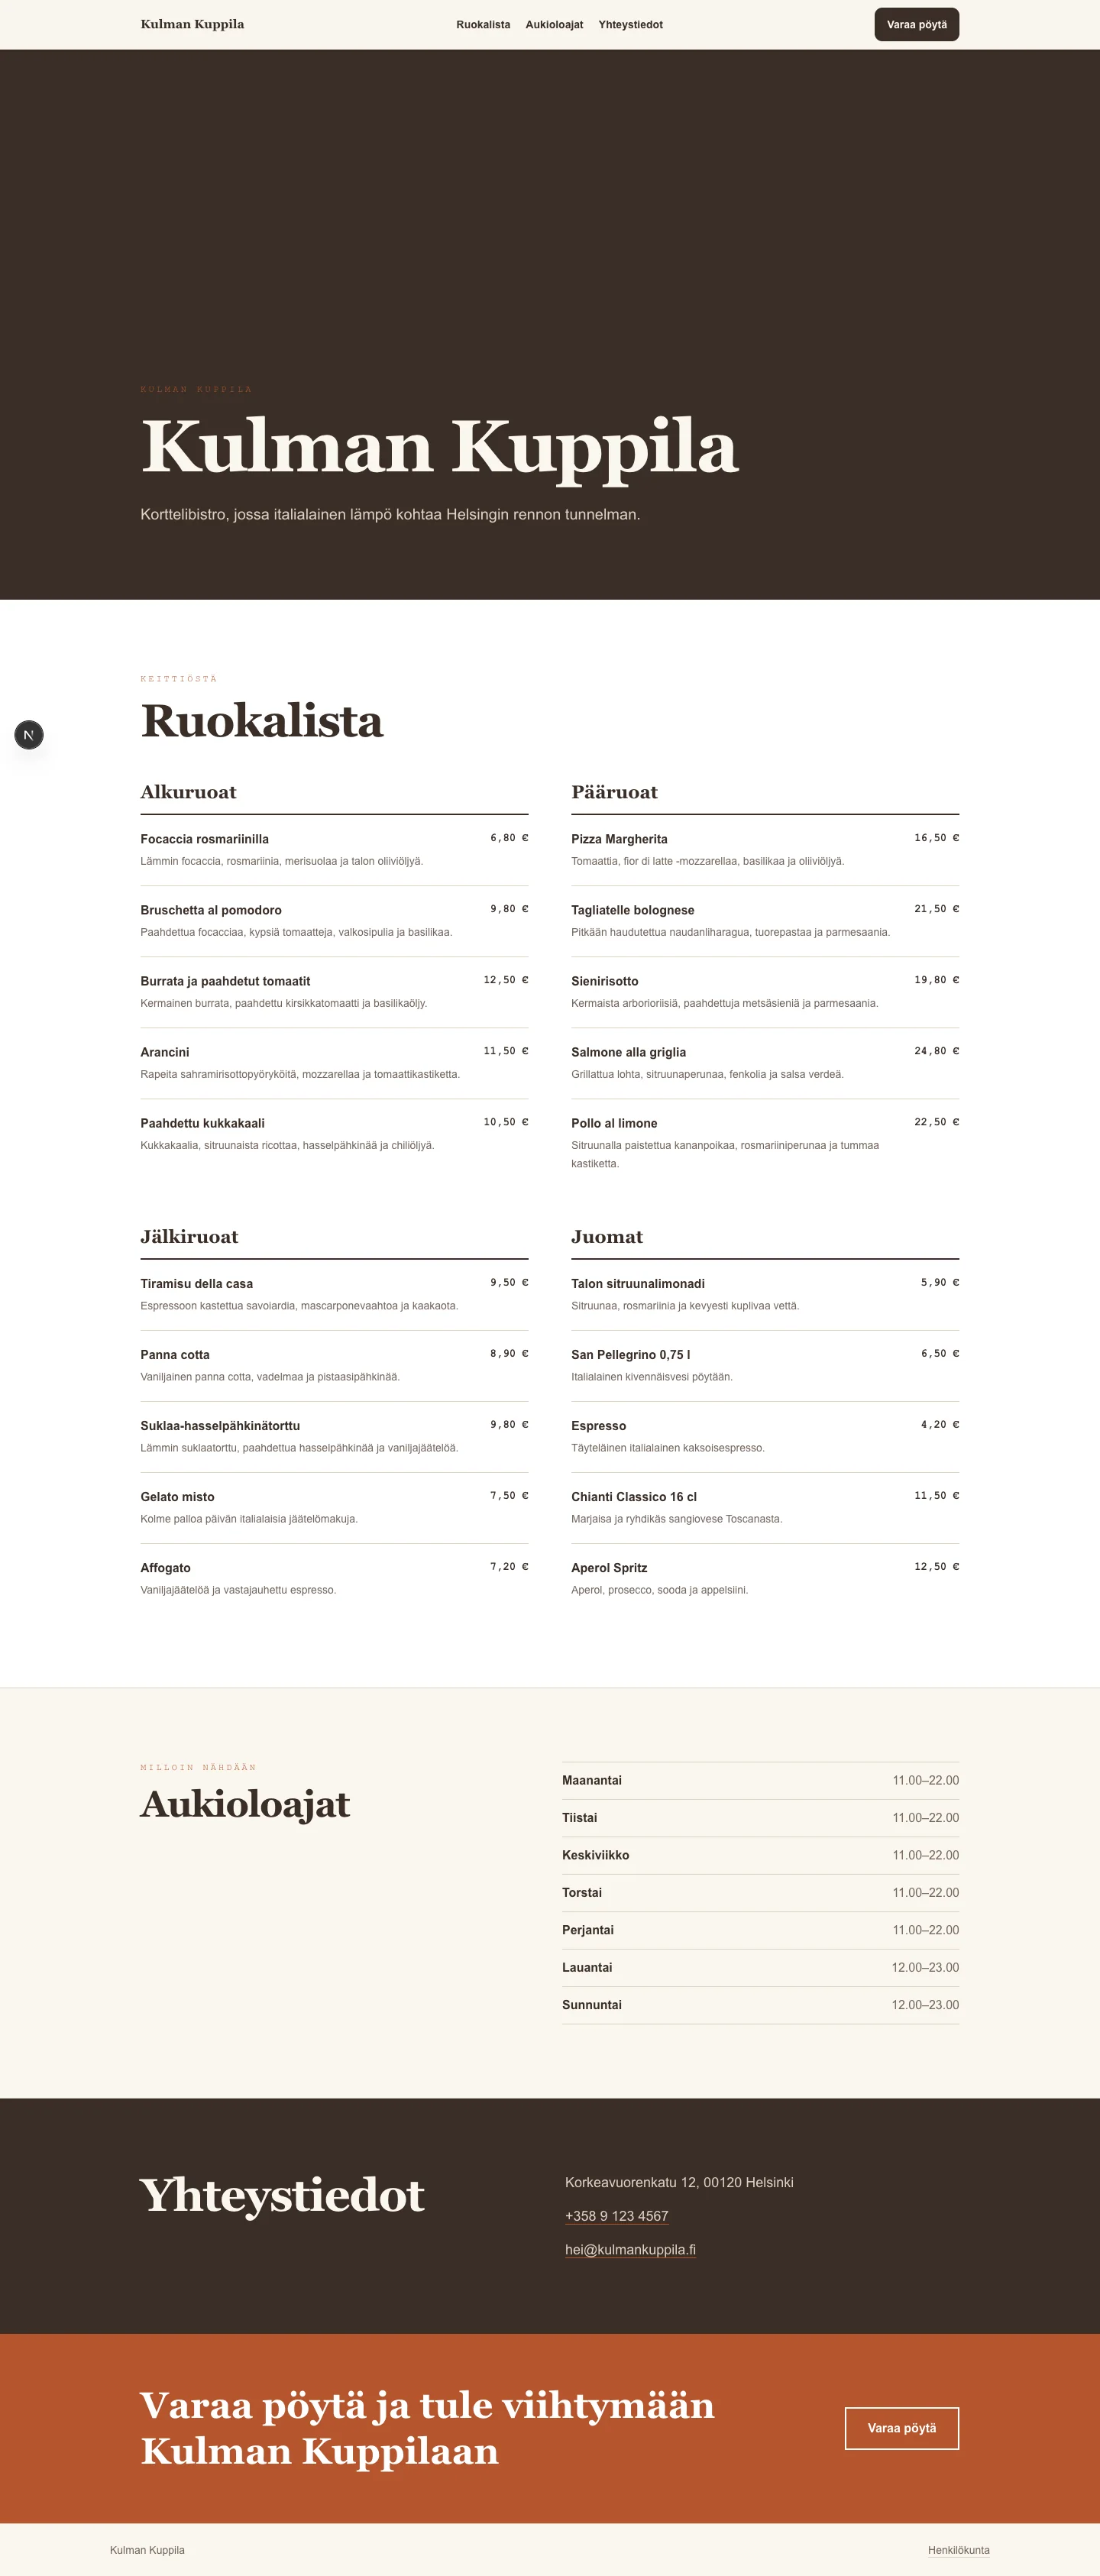
A draft is not visible to customers. Review the complete website with Open preview before publishing.
When the website is ready, select Publish website. The public website automatically creates its main navigation from the enabled Menu, Opening hours and Contact sections. If Bookings is enabled, Book a table remains visible on mobile too. You can later hide the public website again with Return to draft.
Who can do this?
- Owner
- Manager